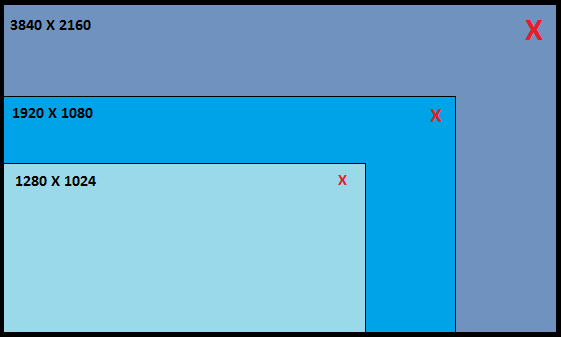
High-DPI (dots per inch) Displays like 4k Monitors make the User Interface elements look very tiny on the Screen. Changing Display Scaling in Windows 10 allows you to enlarge the System User Interface elements so that you can take the maximum benefit from your high resolution Screens without compromising the view. The post describes the various ways in which you can change the Display Scaling in Windows 10
Change Display Scaling in Windows 10
Change Display Scaling Globally
Windows 10 auto selects the Display Scaling for each Display based on the resolution and pixel density. To view the default Display Scaling in Windows 10, Right Click on the Desktop and select the Display Settings option. Alternatively, you can also select the Display option in the Control Panel and then click the Change Display Setting link. On the Display Settings Screen, Windows 10 provides a slider to adjust the scaling. The default scaling set by Windows 10 is 100% for a 1920 x 1080 resolution Display. Clicking and dragging the slider increments the values by 25% and the maximum value on the slider is 175%. Scaling changes made using the slider are system-wide and are applicable to all Desktop items, text and well as the installed applications.
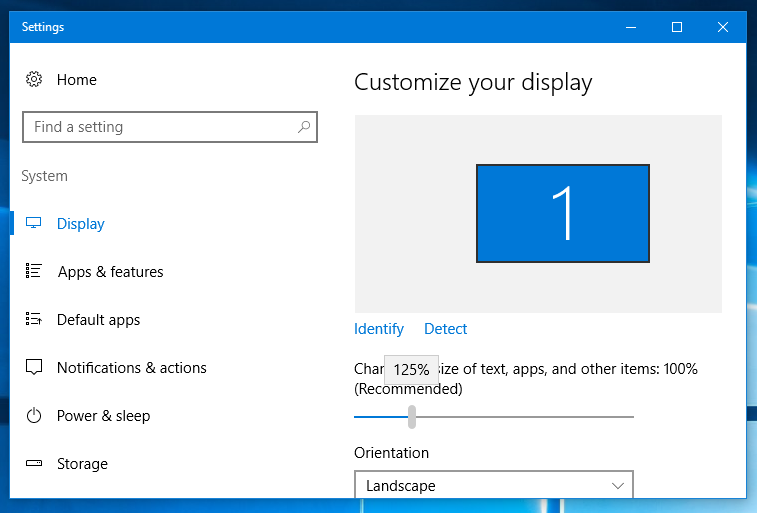
Adjust the Display Scaling by Moving the Slider
In a Multi Monitor Setup, there can be Monitors connected with different Display resolutions. One of the biggest advantages of Display Scaling in Windows 10 is that you can now individually select the Monitor and apply the scaling to that particular Monitor only. In a Multi Monitor setup, you can choose the Monitor to which the scaling is required and then adjust the slider to the required value.
Windows 10 also allows you to manually configure a specific value if the values offered by the slider in increment of 25% does not suit your requirements. Select Display Option in the Control panel and select Set Custom Scaling level. You can select the values from the drop down list or you can slide on the scale to configure a custom value.
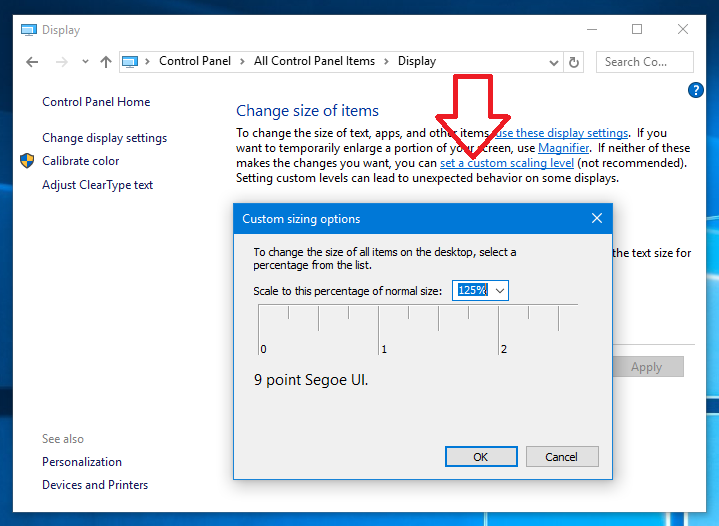
Set a Custom Scaling Level to Change the Size of All Desktop Items
Note : You will need to Sign Out and Sign In again for any Display Scaling changes to take effect.
Change Display Scaling Manually using Zoom Levels
Windows 10 is used on a variety of devices like Smartphones, Tablets, PCs etc. Changing the value to a higher scaling level will change the size of all the Desktop items as well as all the installed applications. Some applications or certain devices do not respond very well to the scaling changes. The scaling changes makes the text or images appear blurry. Sometimes it is a better option to change the scaling of individual application rather then apply the scaling changes globally. You can manually change the scaling by changing the zoom level of the specific application. Most of the Web Browsers as well as editing applications like Paint, MS Word, Apache Open Office offer the zoom option.
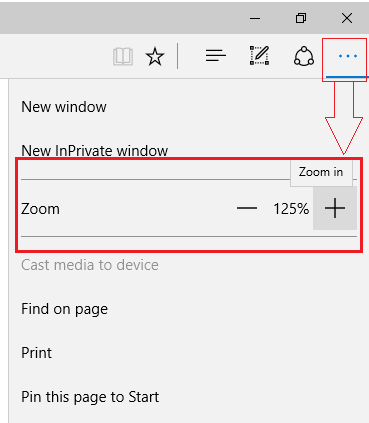
Adjust Display Scaling Manually Using Zoom Level In Microsoft Edge
You can also change the Display zoom levels using a Keyboard shortcut Ctrl + Scroll wheel. Just press the Ctrl key and move your Mouse Scroll wheel to increase or decrease the Display scaling levels. The changes are immediate and does not need any Signing out. Once you close the application the scaling is lost.
Change text size of individual User Interface element
Using high resolution Displays gives you large screen space resulting in a bigger Desktop area. By keeping the default scaling the User interface elements are hard to view. To make the User Interface elements easy to view without changing the Display Scaling, Windows 10 allows you to change just the text size of the elements. To change the text size of the User Interface elements select the Display option in the Control Panel. Select the element and the text size from the drop down box provided. In the screenshot below you can see that the title bar text font size is increased to 14 (default is 9) and made bolder.
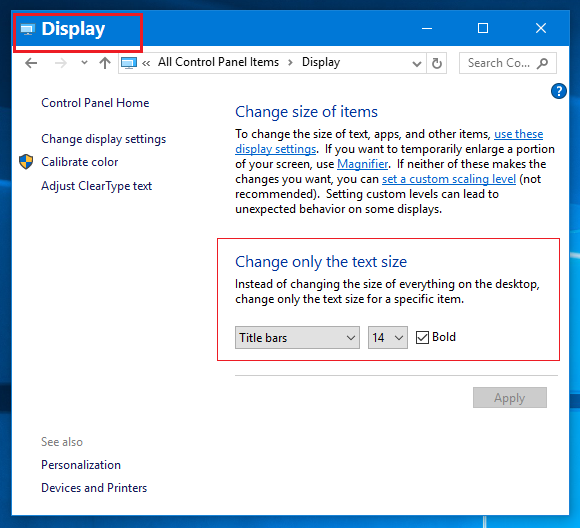
Change the Text Size of User Interface Element
Click Apply for the changes to take effect. You can also change the size of your icons by selecting Large,Medium or Small option from the Desktop Right Click Menu. You can also arrange multiple windows on your Desktop to take full advantage of the extra space that you have got.
Using any of the Display Scaling methods mentioned above, you can now configure Windows 10 to ensure best experience while using your ultra HD Monitors. When it comes to configuring the Display Scaling, there is no right percentage and the configuration depends on the size and the resolution of the Monitor as well as the personal preference of the User.