While working with multiple applications on a single Desktop, you can arrange multiple Windows for a clear view of the applications that you are working on as well as to toggle between them. You can arrange the Windows side by side, or cascade them or stack them as per your convenience. This post describes the various Window Management options available in Windows 10 that you can use to organize your Desktop.
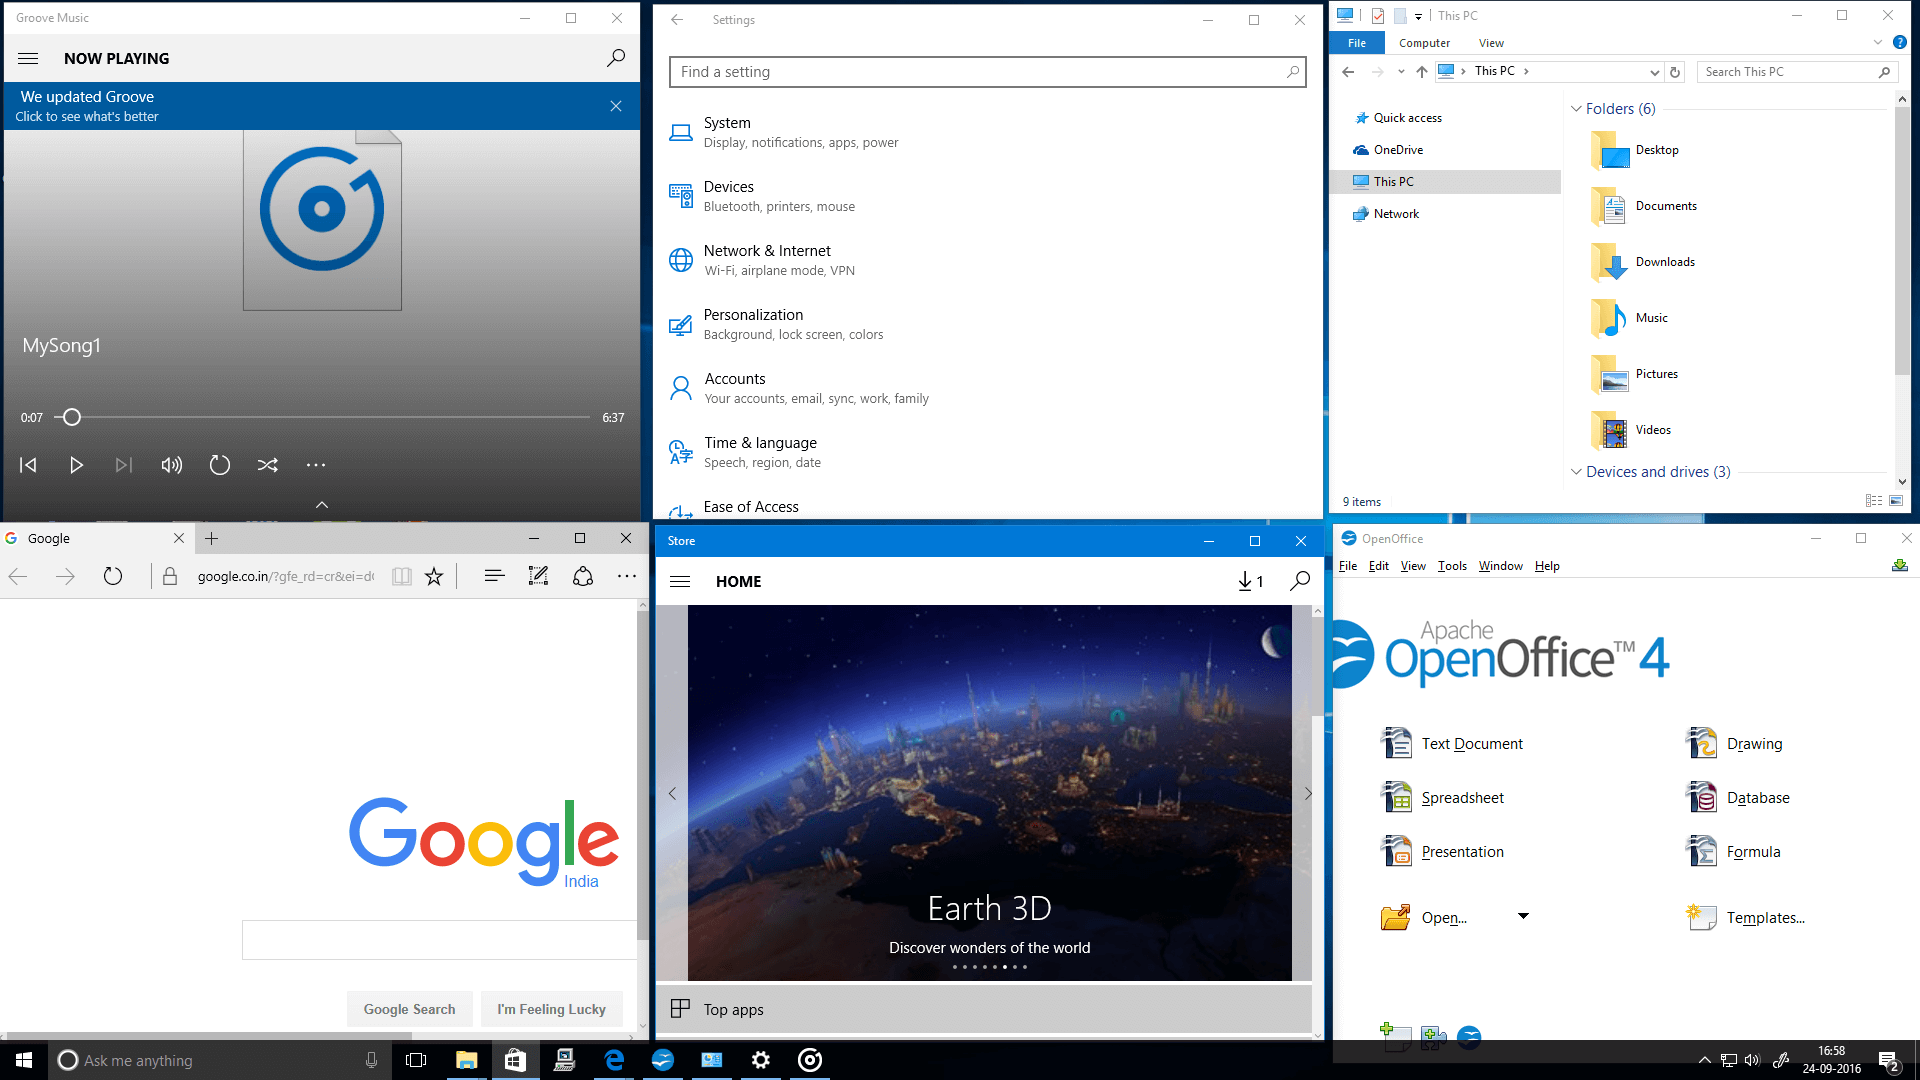
Multiple Windows Arranged Side by Side on Desktop
Arrange Multiple Windows using Snap Feature
Windows 10 provides a useful Snap feature which allows you to arrange or snap your Windows to the four corners of your Desktop. You can access this Snap feature by selecting the Display Settings option in the Desktop Right Click Menu and then selecting Multitasking from the Settings Screen.
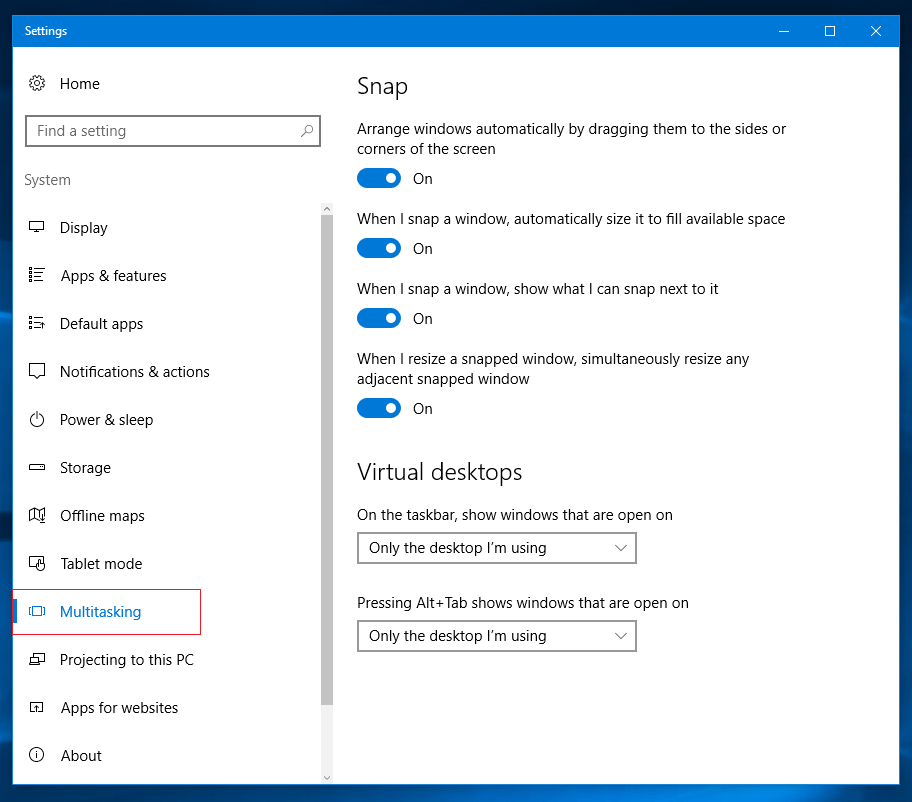
Select the Multitasking Option from Display Settings Screen to Access the Snap Feature
Organising multiple Windows using Snap is simple. Just click on the title bar of the Window and drag it to the edge of your Screen. You will view a outline of position and size your Window will occupy. Just release mouse button there if that arrangement suits you and the Window will take up that position. You can Snap the Windows and make grid of maximum 4 Windows. You can have just 2 Windows or you can even have one Window occupying the half screen and the other application occupy the remaining half.
Arrange Multiple Windows using Snap Feature in Windows 10
Once you arrange a single Window, the thumbnails of the other open Windows are displayed in the remaining empty space. Just Click on the other Window to be arranged and it will take up the adjacent space automatically.
The Settings Screen also provides an option to view Windows on Virtual Desktops. Creating Virtual Desktops, you can significantly increase your Screen Space. Refer to the article Multiply your Screen Area on Windows 10 published on this website for a detail understanding of creating and using Virtual Desktops in Windows 10.
Cascade, Tile or Stack Windows using taskbar
Using Taskbar options is an efficient way of arranging multiple open Windows. Taskbar provides 3 ways as mentioned below to adjust Windows on Desktop. While some arrangements suitable for Monitors having large horizontal space, some arrangements are better for viewing fewer applications.
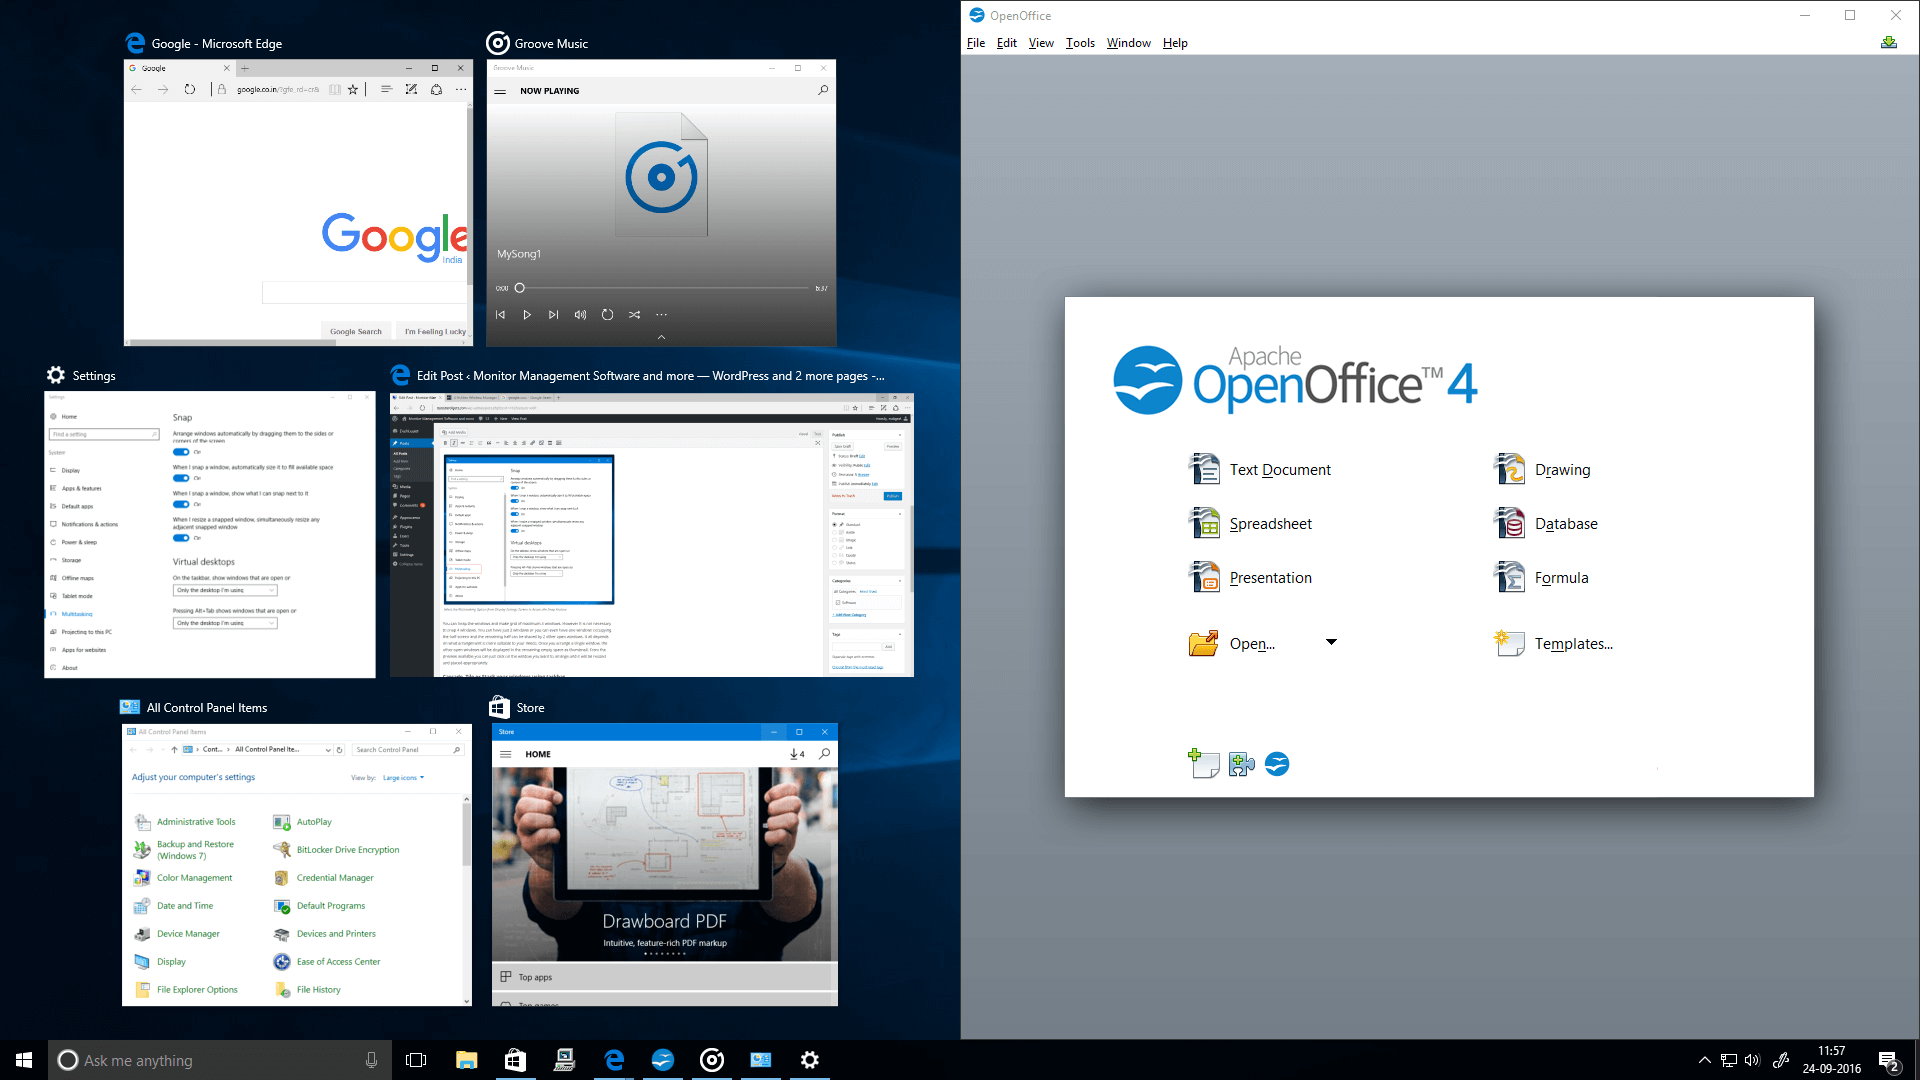
- Cascade the Windows – This option displays the open Windows on top of each other. You can view top most Window completely while the title bars of the other Windows are visible. To bring any other Window to the top, you need to click on their title bar.
- Stack the Windows – Using this option, you can arrange the Windows vertically one below the other like a stack. The number of vertical rows created depends on the number of Windows that are open.
- Show Windows Side by Side – Use this option if you want to arrange Windows horizontally. It is more like the snap feature however, you can arrange more than 4 Windows at a time which is useful for big screens with a lot of horizontal space.
Multiple Window Arrangement Using the Cascade Option from Taskbar
If you have re-arranged your Windows using any of the above taskbar options then you will also see an Undo option added in the taskbar. You can use this option to remove the changes that are done. There is only one undo option and it gets added based on the type of arrangement option you have selected.
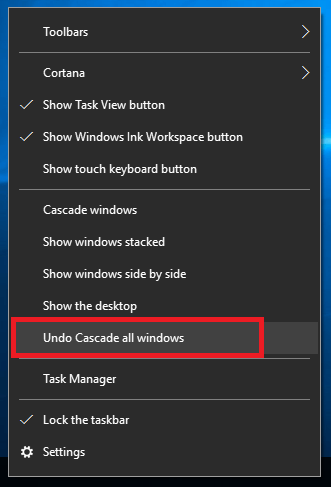
Undo Option in the Taskbar Menu
Arranging Windows using Keyboard Keys
You can maximize, minimize or move the Windows to left or right of the Desktop using Windows Key + Arrow Keys combination. Lets see how these buttons act on an open Window
- Windows Key + Down Arrow Key – If used on a Maximized Screen, pressing these keys will reduce or restore the size of the Window. If pressed consecutively 2 times then will minimize the Window.
- Windows Key + Up Arrow Key – This will maximize any Window to take up the entire screen area. If the Window is occupying half space vertically, then using this key you can also reduce the size of the Window and place it at the top left corner of the screen.
- Windows Key + Left or Right Arrow Key – Using this Key combination you can move the Window to the left or Right . Use these left and right keys to move around the Windows and position the Windows as per your needs.
Arranging Multiple Windows Using the Keyboard Arrow Key
Arranging Windows using any of these features makes Multitasking in Windows 10 very convenient. Snap, cascade, tile or place the Windows side by side using any of the ways mentioned to arrange the Windows in the desired order to optimize your Desktop space.